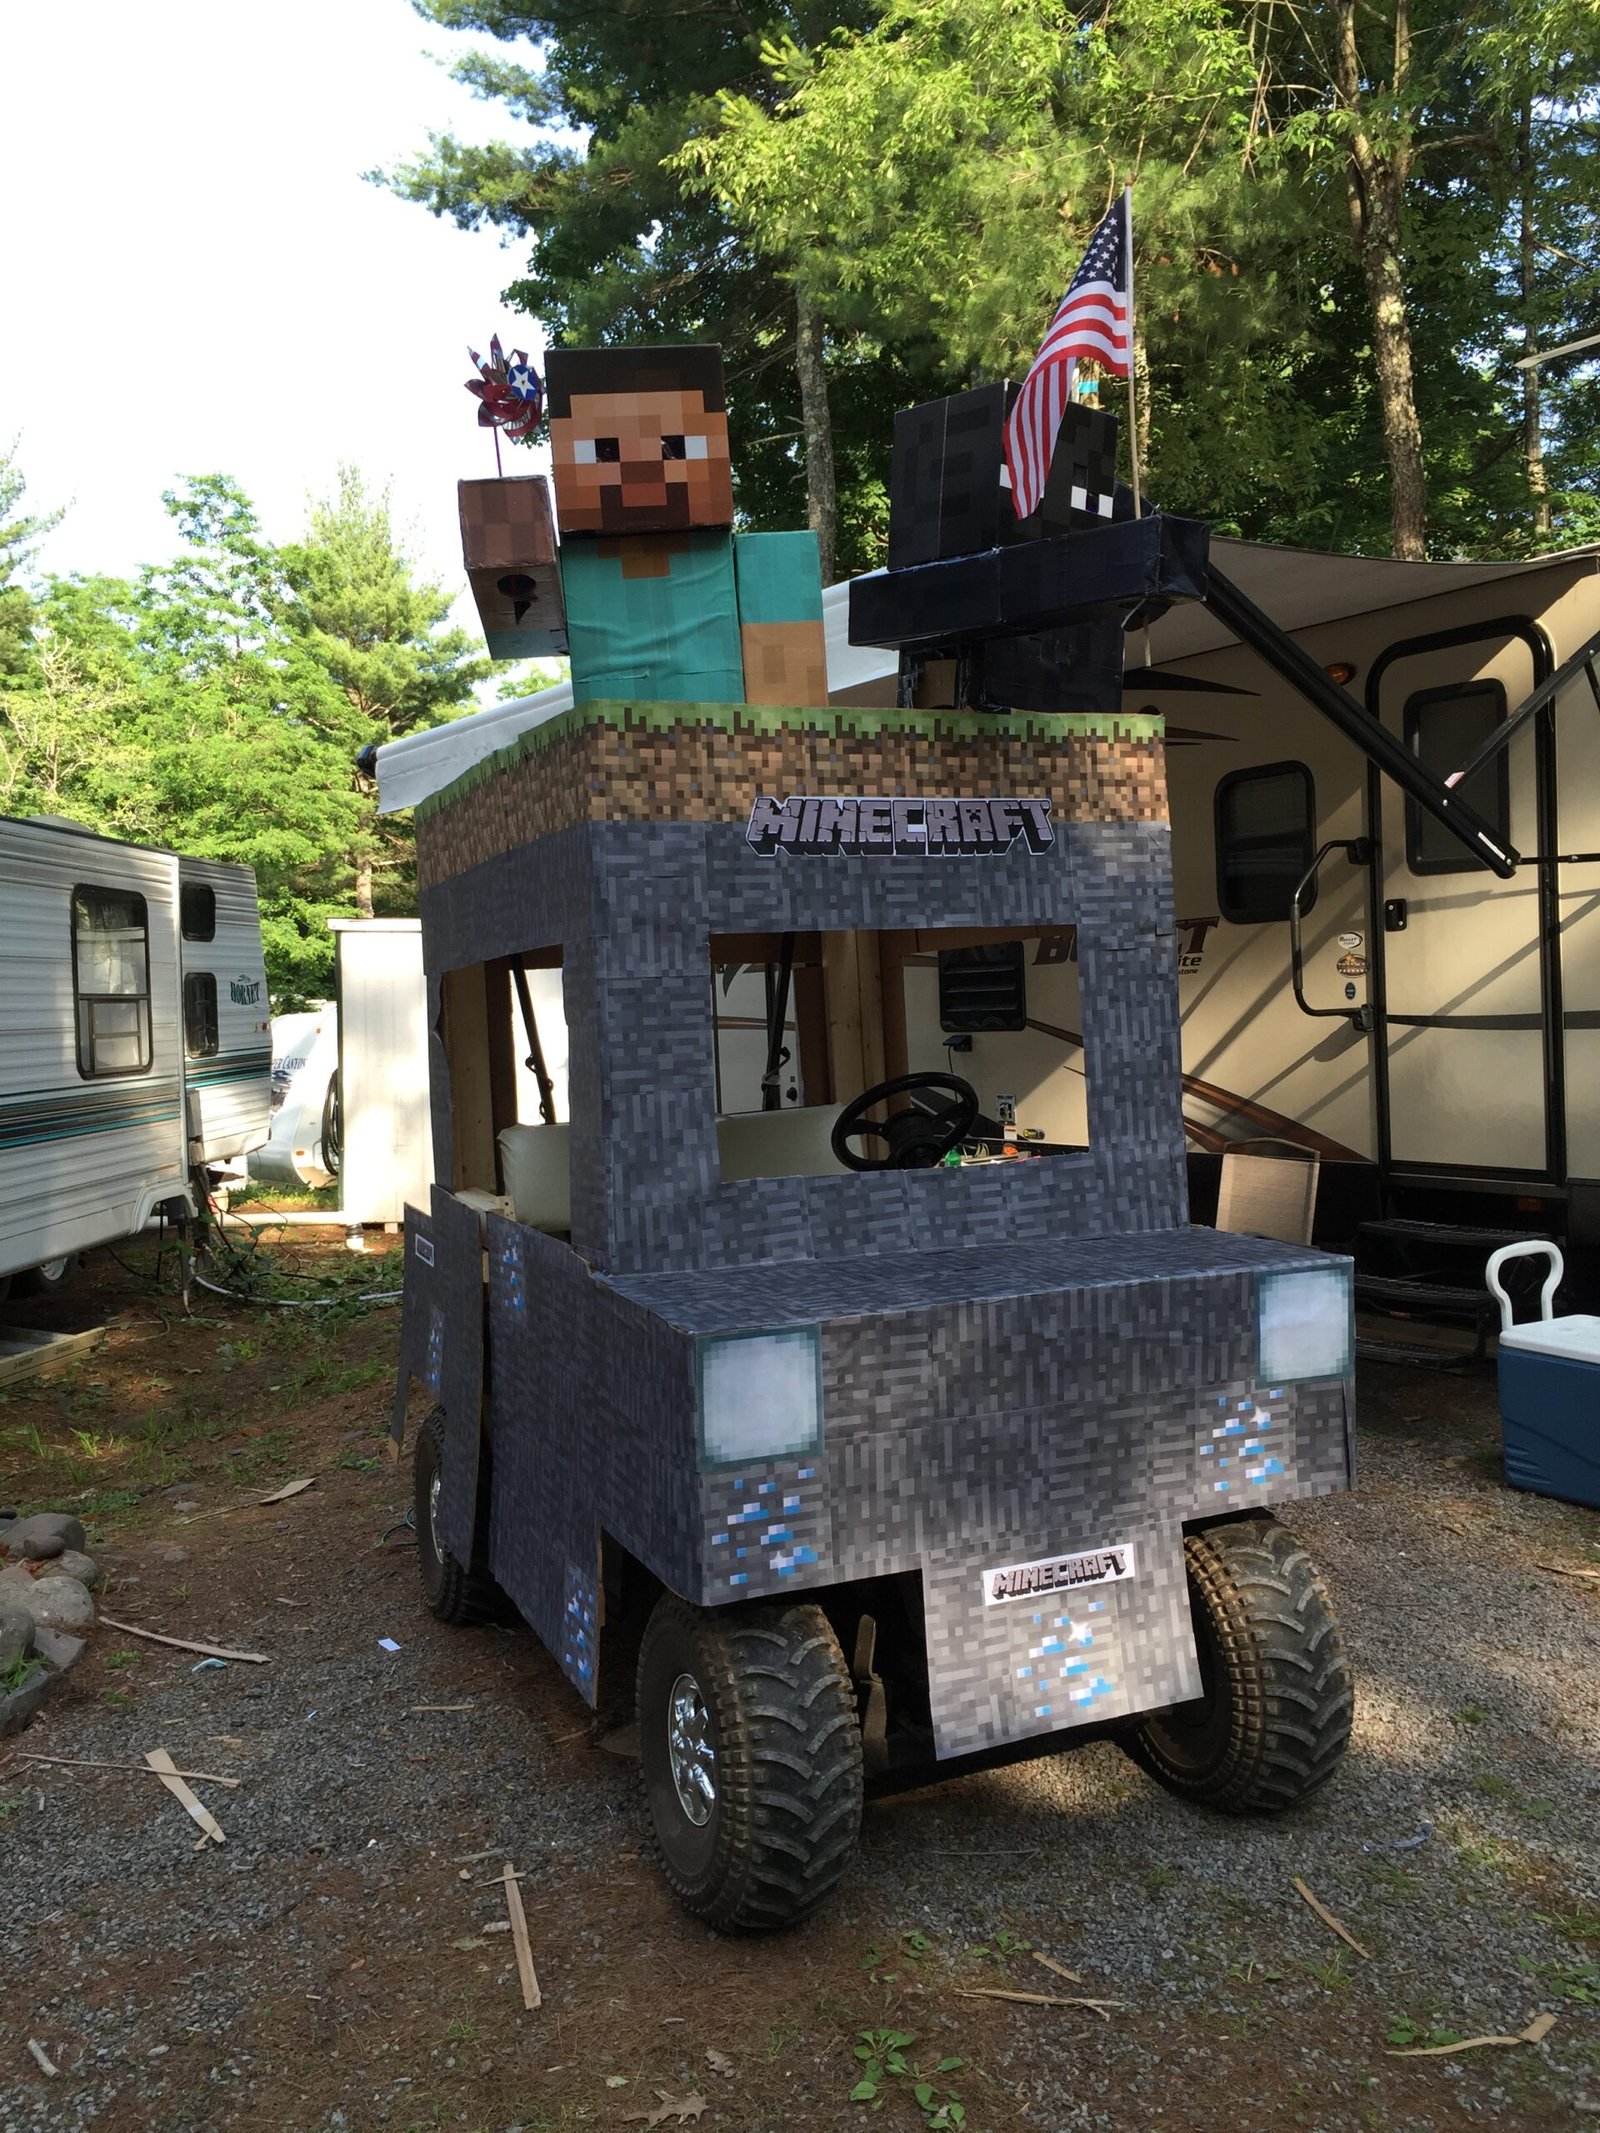
Stand out with this Minecraft winning golf cart parade design
In this article we will give you step-by-step instructions to build a Minecraft winning golf cart parade design. Minecraft is a popular video game where the player builds structures from blocks. Minecraft was the very first golf cart entry we did of our own. Our kids picked the theme, my wife gave some input, and I got to work. This one was not built optimally, so I will provide some details on how to improve the design toward the end of the article.
How to build a winning Minecraft golf cart
In order to build a winning entry, you’ll need to fit the design to the cart, gather some materials, and get to work. You can do the work without the golf cart physically present, if you take good measurements and understand how things will fit together.
Materials needed
For this particular build, we overbuilt it a bit with a wooden frame attached to our golf cart. the materials needed:
- Several large pieces of cardboard (corrugated plastic cardboard is better)
- Spray adhesive (Super 77 is the best but craft spray glue will do in a pinch)
- A pack of 12” zip ties
- A computer and a color printer (inkjet is ok, as long as it doesn’t rain)
- Wood strapping (optional if you use corrugated plastic)
- Duct tape (Gorilla tape is the best)
- Scissors
- Box cutter
- Staple gun
- Metal ruler (or something at least 2 ft long that won’t bend or get damaged by a blade)
Step 1: Build the frame
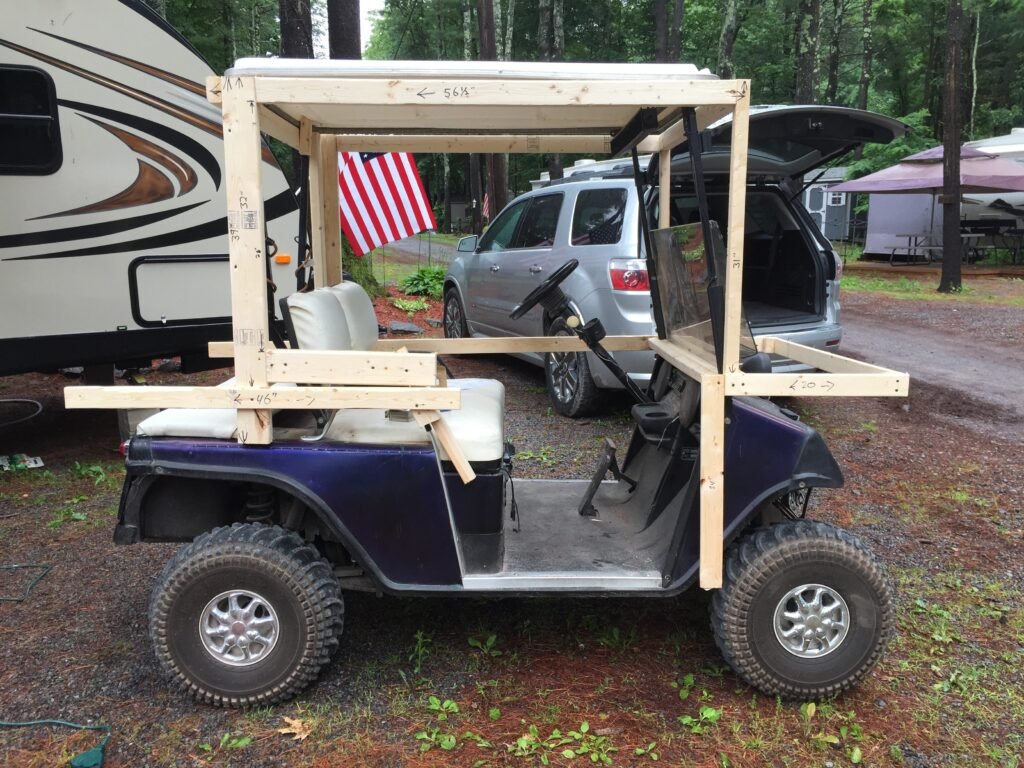
The very first thing we did on our Minecraft golf card was build the frame. We needed the frame to support the weight of the cardboard and allow it to take its shape.
In my later builds I stopped using frames because I was able to make the corrugated plastic more rigid and the plastic is much lighter. For this one, I cut some scrap wood strapping (1×3) and screwed it together so I’d have something to attach to the cardboard to. The wooden frame was attached to the golf cart frame by zip ties and Gorilla tape.
Step 2: Cut and attach the cardboard
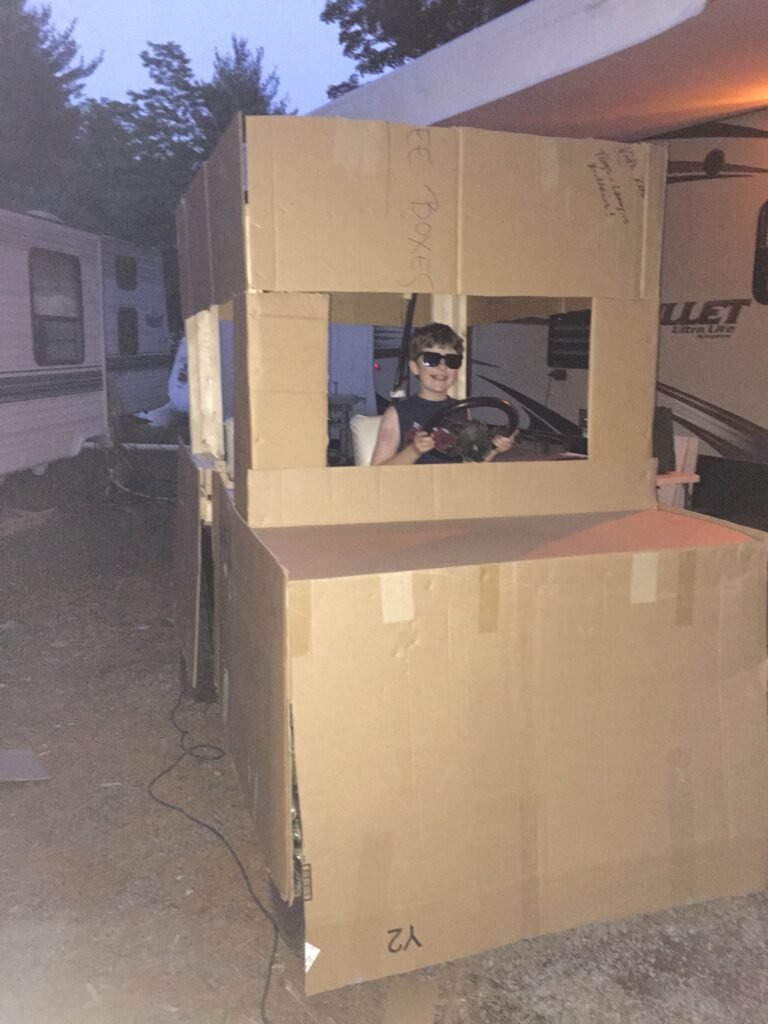
In this step, we cut the cardboard to the shape of the frame. The cardboard was cut from appliance boxes and moving boxes, using the box cutter and scissors. We cut the cardboard so it wouldn’t rub on the wheels and had the appropriate visibility. We used a 2ft metal ruler to mark the holes for the windows so the cuts were straight.
In this particular build we attached the cardboard to the frame with a staple gun, and secured the edges and corners with packing tape.
Step 3: Create and attach the skin
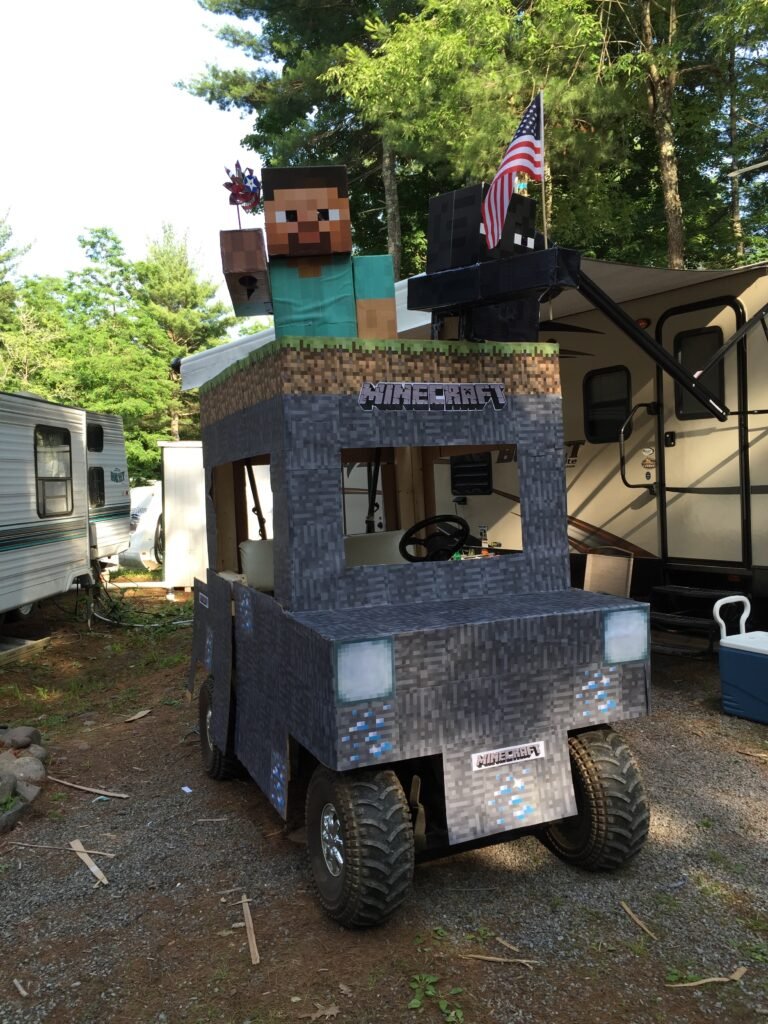
To create the Minecraft surface appearance, we went online and grabbed an image that looked like the common block types in Minecraft. We then measured the entire surface area of the golf cart, to figure out how many of those blocks we needed to print and trim.
Print the skin
Since we knew there would be a lot, we used a paper cutter to cut them all to side. The blocks themselves turned out to be 8” x 8” since we could fit them on a single sheet of paper. We used roughly 100 printed sheets and one full ink cartridge (due to trial and error).
Attach the skin
This part is a little tedious, but if you take your time it will come out really nice.
Lay down some scrap cardboard on the ground. Place each printed “block” image side down on the scrap cardboard. Lightly spray the back of the paper, using just enough to cover the entire page. Pick up the paper by its edges and stick it neatly to the side of the cardboard on the golf cart. Do this about 100 more times.
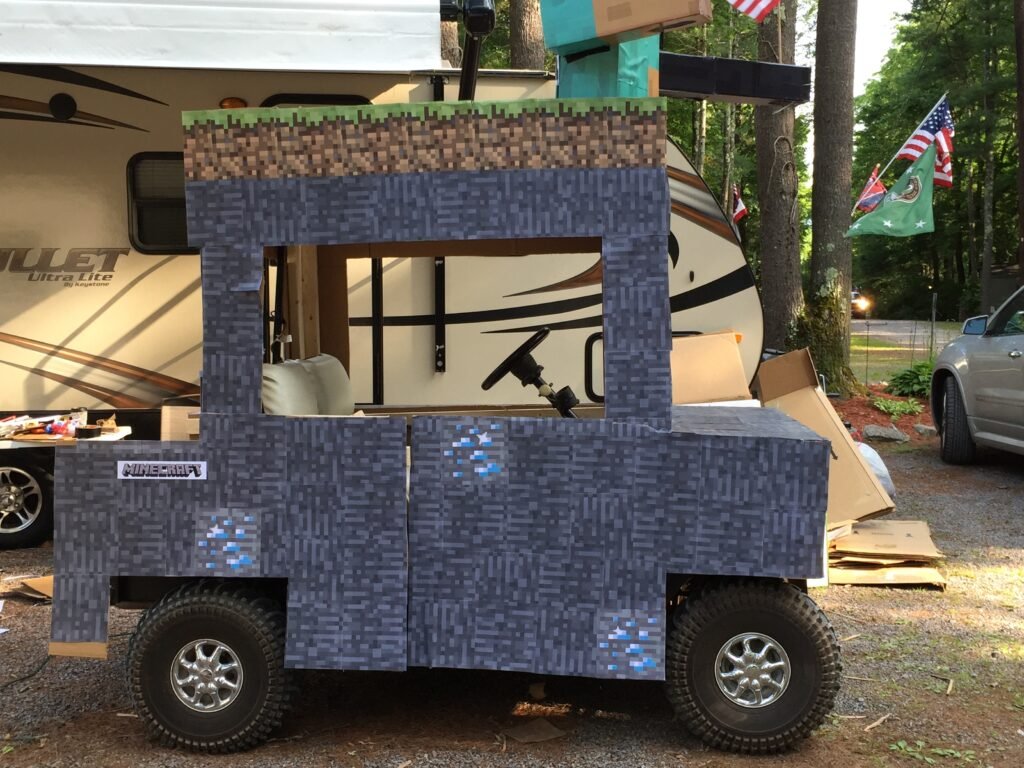
In our case, we also printed out some Minecraft logos, some other block types, and made it look like the golf cart was “crafted” in Minecraft.
Step 4: Finishing touches
Once you have your base built and everything is dry, it’s time to add some finishing touches. This can be having a driver dress in a costume, or adding something you purchased to decorate further. In our case, we had some costumes our kids used for Halloween that we added to the top of the golf cart to really put it over the top.
Step 5: Test Drive
I cannot emphasize enough the importance of a test drive. We quickly figured out parts that were rubbing and loose and applied some extra Gorilla tape to them. Make sure you also know the clearance of your build so you don’t find yourself removing pieces by driving under a low tree branch or a small covered bridge.
Conclusion
The Minecraft golf cart build was one of our first, but it worked out well in that we won our first time entering, and we were against 75 other entrants. Everything held together, and to some extent the cart was overbuilt.
Take your time, make plenty of measurements, and most importantly, have fun!

